How to add a sales banner to your website
The banner is ready-made code you paste on your website or blog. A visitor clicks it and lands straight on your product's checkout. You configure how the banner looks and see a live preview right below.
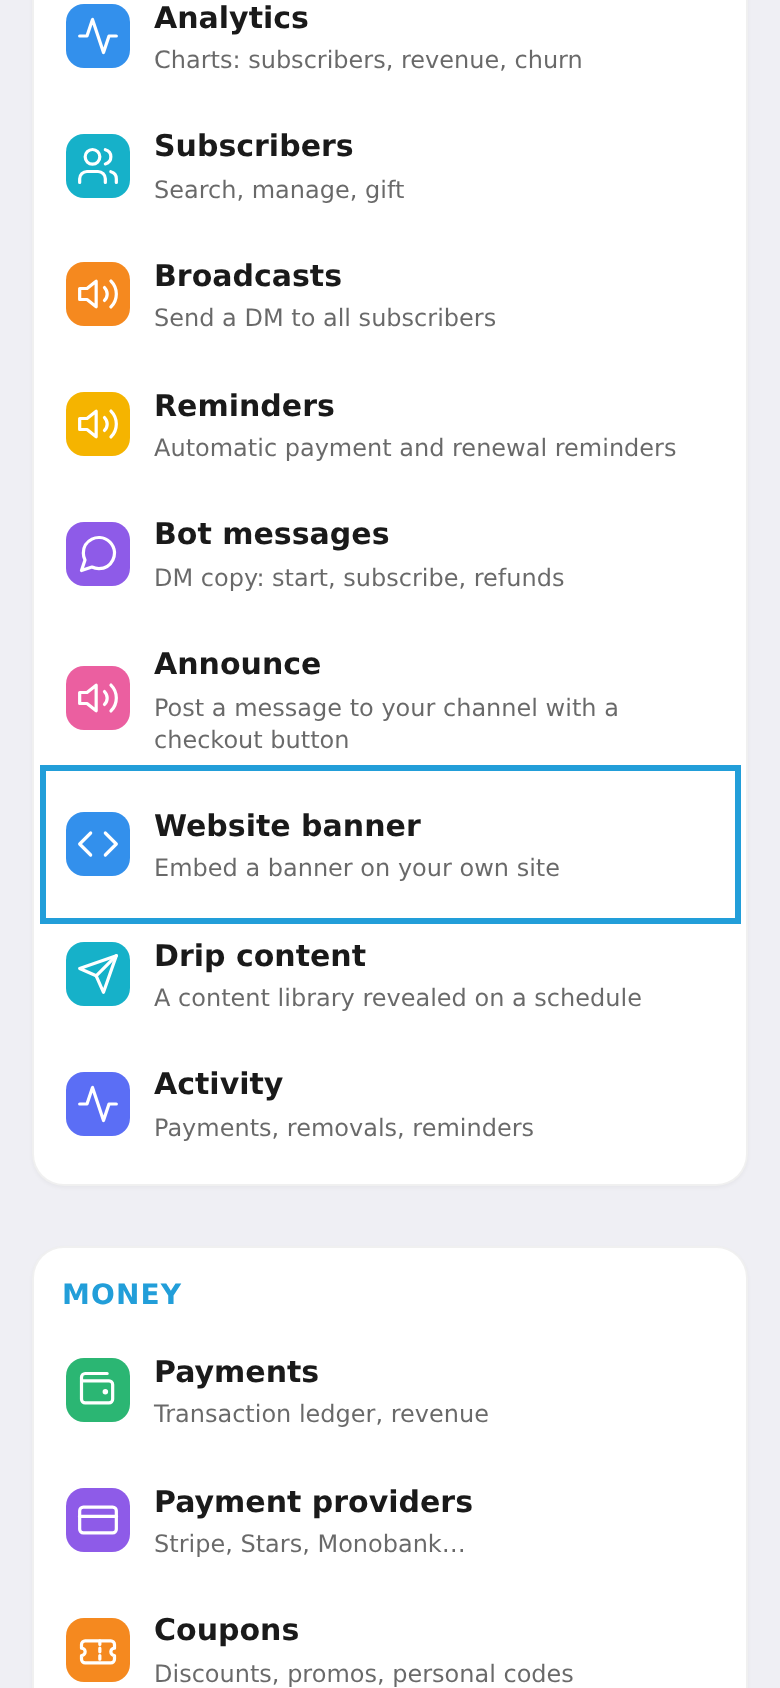
Step 1. Open "Website banner"
In the workspace menu, choose the "Website banner" tile (banner code for your website).
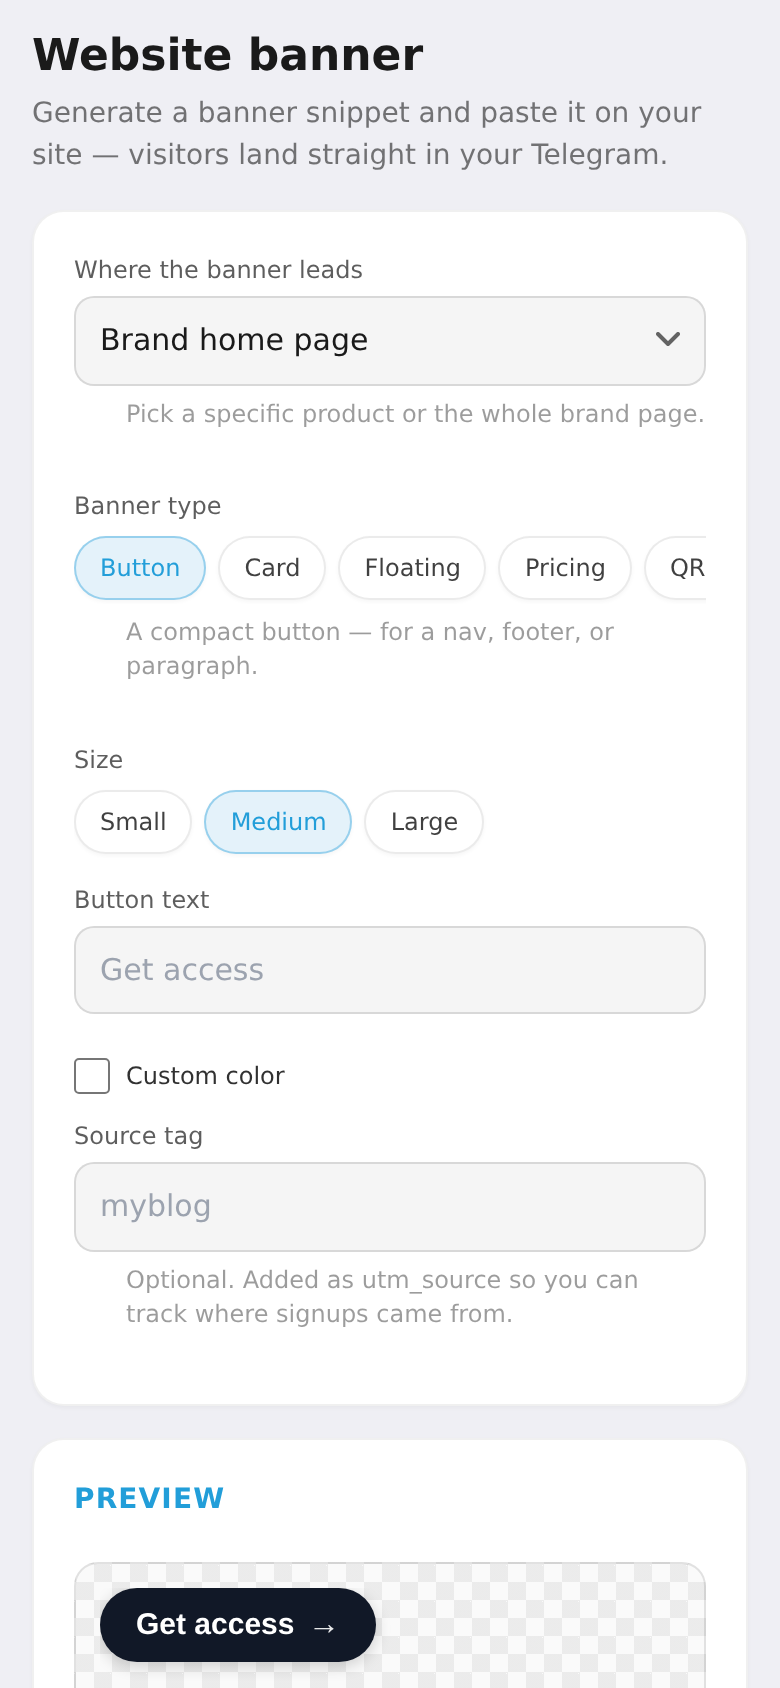
Step 2. Configure and copy the code
Pick a product (or the brand home page), the banner type (button, card, floating, QR code, pricing table), the size and button text. Optionally — a custom color, image, benefit bullets. A live preview sits below (examples of each type are in the next step). Tap "Copy snippet" and paste it on your site (the recommended "script" option auto-adjusts the height).
Step 3. Banner types at a glance
See how each type looks, then pick the one that fits your site.
Button — a compact button for a nav, footer, or inside a paragraph.

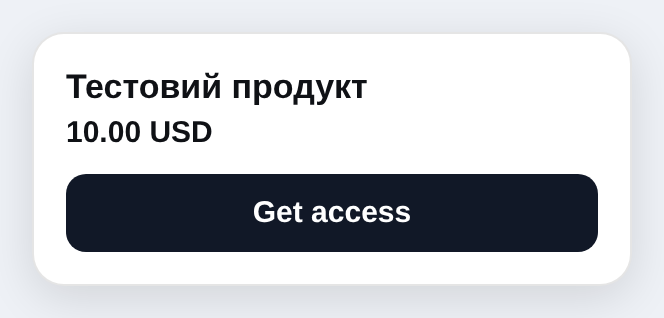
Card — title, price and a button in a tidy card (a product cover or logo shows here too, if set).
Floating — the same button, but on your site it sticks to a screen corner and stays visible as the visitor scrolls.

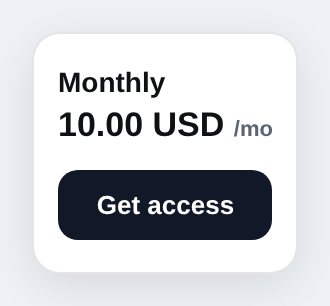
Pricing table — all plans side by side; each button opens checkout right on the chosen plan.
QR code — for print (poster, flyer) or a desktop→phone handoff.